2012-08-26

That's how you mount things

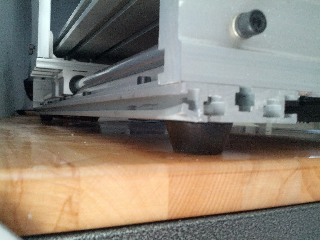
Got a real big vice to quickly mount blacks onto the CNC router.
Found it for cheap on Ebay.
Much faster then working with T nuts even for the small parts.
Also got my edge finder.
Purely mechanical one. The ones that can use the probe input of the machine cost a fortune.
:(


2012-08-25

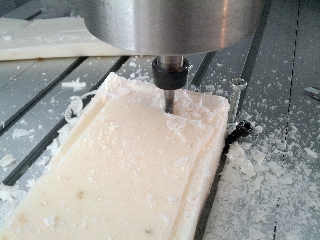
First CNC milling

Got down to business with my CNC mill.
X and Y axis sometimes skip steps.
Slowing down helps only do far.
T slot tables are really good at collecting shavings.
Spindle doesn't run as hot anymore.
Was probably just the hot weather outside.
Milling much faster and deeper then in the first tests now.
Still need to add end stops.
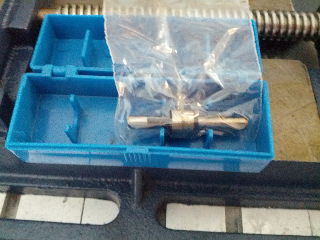
My 6mm CNC edge finder arrived.
Will have to play around with it

2012-08-22

RS485 spindle control

Ryan Matthews found a way to control the spindle of the same YOOCNC CNC6040 mill I have via RS485.
So I just ordered myself a USB-RS485 adapter.
Let's just say that I don't recomment the "ColorApples Cool Gadgets Mall.". Their Paypal checkout process is broken beyond repair.
(I'm doing these postings mainly for my self, so I can find these links without digging through my Google+ history.)

    2012-08-19

    First tests of CNC milling


    I got it to mill my first test models from the CAD program down to executing the toolpath on my new CNC mill.
    I used:
    • the demo version of MACH3 (limited to 500 lines of g-code and a low speed. carving-cnc had a printout of the settings.)
    • Deskproto 30 days eval version. (4 axis version is nearly 1000eur. It's really nice to work with but I won't use this after the 30 days. Just too expensive.)
    For MACH3 I found that I had to calibrate the steps/mm (settings tab, lower left corner).
    The supplied settings where moving about 150% of the intended travel. So e.g. G1 Y100 moved to 158mm .

    Lessons learned so far:
    Things that default to imperial units suck.
    Ok,.imperial units suck in general.
    A spindle is very good at heating up a full bucket of water in no time even at minimum speed.
    I need better clamps to fasten things to the work table.

    2012-08-18

    Mounting 4th axis

    Now there is a problem.
    I wanted to mount the 4th axis below Z=0 to mill parts with a diameter of 12cm plus a core.
    The machine only has 6cm of Z travel.
    That sled of the Y axis is a problem...

    Cnc6040 assembly started


    Just moved everything into the workshop and tried to start assembly...
    ...this is going to take a long time.
    The machine was very well packaged and this was badly needed. One edge of the really heavy work table got bent out of shape in transport.

    Assembly is straightforward.
    Nothing was missing.
    Tools required:
    1. 0.8x4mm standard screwdriver
    2. metric 3,4,5 and 6mm hex keys.
    Status: IT WORKS.
    I can jog all 4 axis with and without the spindle running at full speed and I can see the probe working too.


    2012-08-16

    CNC6040 arrived!!!

    Guess what else arrived?
    My chinese YOOCNC  CNC6040 milling machine!
    I expected to wait another 3 weeks for this and just got a call from some DHL guy that he's waiting with some really heavy package at my door.

    Didn't fully unpack it yet. Just peeked inside. Looks fine.
    Will drive it home to my workshop tomorrow and hopefully set it up this weekend.

    LM8UU for camera slider

    Just received 4 LM8UU sliding bearing to make myself a really nice and dirt cheap camera slider using one of the 3D printers. :)
    For some obscure reason these simple things are sold for an arm and a leg.

    2012-08-13

    CNC6040 - electronic nigthmare


    Yes, this piece of junk is exactly the machine I just ordered for myself a few days ago....
    Mechanics are cool but the electronics and cabling have to go. Period.

    2012-08-11

    Biometric passport for Google Summer of Code summit

    I couldn't avoid it any longer.
    The government gets my fingerprints on file.
    I have a chance to fly to Mountain View to represent Open Steet Map because I am mentoring a student in the Google Summer of code.
    (He does really great.)
    At this point its just a chance.
    There are others and the budget for travel of non US residents is limited.

    Wish me luck!

    ready to go mechanical platform for 3d printer

    http://www.automationtechnologiesinc.com/products-page/3d-printer/3d-printer-mechanical-platform-no-controller

     ...if this used trapezoidal spindles instead of M8 threaded rods and I didn't have second thoughts about an overconstrained Z-exis, this would be tempting.

    Milling wax test on the RepMan

    First test of milling wax (on the RepMan, because my CNC mill takes a few weeks) are super positive regarding the wax and negative regarding the Repman.

    I can cast blocks of Wax very easily and milling them even with just a Dremel and a RepMan 3D printer is like milling soft butter.
    However the RepMan has an issue of homing at the start of a new g-code file even after doing the firmware upgrade to support G91=relative coordinates.
    So you can't position it at a fixed point on the surface of your object (possibly using a probe to find just the height of the surface and just the edges or the center of a hole) and start milling right there. You have to meassure and change all the coordinates in your G-code to that offset because you have only global coordinates.

    2012-08-09

    CNC mill


    Just ordered myself a chinese CNC mill. Model "YOOCNC 6040Z+S80" from "carving-cnc".
    I thought GoCNC first but they use threaded rods instead of even trapezoidal spindles and employ Dremel and Proxxon as spindles. This one used a ballscrew and comes with a water cooled 1.5KW drive.

    I know, it won't be a high end device. It can barely do metal but it should be sufficient for light wood, acrylic and wax with it's supplied 1.5KW spindle.

    So far I found out that I have to check the following:
    1. Check for loose bolts and righten everything down.
    2. Mill a perfectly flat bed. 
    3. Check grounding and cooling on all electronics.
    4. Replace stepper-wires with shielded ones.  Test all stepper wires for broken ones.
    5. Add 2 end stops for each axis. (pins 11,12,13) with a 500 Ohm resistor from +5V to pin 15
    6. Add a probe input (pin 15)
    7. Insulate the spindle from the case to avoir random interference into the x,y,z steppers. 
    8. Check heatsinke for the possibility of them creating shorts due to not being deburred. 
    9. "I then read the download manual that came from site and all configurations seemed correct, until I downloaded a Mach3 manual which show that in the configurations the dir pulse is active high and should be active low, note when you change this you will need to reverse direction of motor, as it changes direction." 
    10. Add a connector for a probe
    11. Replace the water hose and pump. Check the original hose for kinks.
    The plan is to  use this for parts that are difficult to do on the 3D printers or require materials I can't print or print molds for.
    I'll post about the progress and issues with this machine under the tag "CNC", so others can read up on how these machines perform and where they fall short.
      • CamBam looks line to start with but doesn't support the 4th (rotation) axis.
      • deskcnc (how to buy just the software?) and
      • deskproto (995eur for multi-axis version) have a 30 day trial and can do this 
      • MecSoft FreeMILL seems to be limited to carthesian 3 axis but is free
      • PyCAM also 
      • GcodeGenerator runs from inside Blender 
      • maybe enhance this Java software to create 4 axis g-code for following the surface normal 
    Things to get:
    timeline:
    2012-08-08 ordered and payed via paypal (so I can dispute and get my money back if they don't ship)
    2012-08-08 no order confirmation but a hand written email with details about the shipping process and customs
    2012-08-16 Machine arrived !!!

    specs:
    X,Y,Z Working area:  580×380×60mm
    Max. Feeding height: ≤100mm
    Outside dimension:  880×660×520mm
    Table size: 745×480mm
    Lathe structure: 6061/6063 Aluminium alloy
    Stepping motor: two-phase 57/3A (2.2-2.5mH inductance)
    Drive unit: 1605 Ball screw
    Sliding unit:: Chromeplate shaft
    Maximum speed: 0-4000mm/min
    Engraving speed: 300-3000mm/min
    Repeat positioning Accuracy:  0.05mm
    Spindle: 1500W VFD spindle motor
    Spindle speed:  24000rpm
    Cutting tool-holder: ER11-A: 6mm and 3.175mm( =1/8" )
    Interface: Parallel port
    Software Compatability: Mach3/Emc2,(Type3,Wentai, ArtCAM)
    Command code:  G code/.nc/.ncc/.tab/.txt
    Weight:  55kg
      

    2012-08-07

    Where Google Latitude fails

    Just a quick list about Google Latitude and in just how many ways it fails:

    • The Android App can send but not receive or accept/decline friend-requests.
    • You receive Friend-Requests in Gmail. Talk about mixed media.
    • Clicking on the link in Gmail shows "Your browser is not supported by our webpage" (It's a mobile Firefox).
    • Clicking on the link in Gmail and selecting to open it with Latitude brings up an empty Google maps. Nothing about accepting a friend request.  Not even opening the Latitude part of Google Maps.
    • Checking in, you get a top-10 of your G+ contacts. You can't add or even click any of them.
    • You can't add them manually *at all* because you can only add people by email and you don't get their email adresses.
    • After checking in... you don't see who of your friends checked in too. So you can't go looking for them wich is *the point* of Latitude. You're not checking in to add reviews and stuff. That works fine without Latitude.
    • 3 phones of 3 people next to each other. Each phone shows a different combination of each one's checkin-status. None of the 3 phones is right.
    • New friends don't apear when you click "update". They suddenly apear when you close and re-open the Latitude part of Google Maps.

    2012-08-02

    Thing-o-Matic rant

    DAMN THIS CURSED ABDOMINATION OF A -O-MATIC !!!
    3 prints failed 6 times. That darn extruder stopping to extrude any more plastic. I damn need these parts until tomorrow.

    IF you happen to be in front of the device and notice it, you can lower and then raise the pressure mid print but if you missed it because it's serveral 30-45 minute prints, you are ****.
    There is no real pause+resume where the head is raised. No way to decrease speed, go back a few skipped layers, alter the extruder-RPM and/or temperature mid-print. You are just **** .

    With the Replicator out there is no hope that Makerbot industries will ever release a bugfixed upgrade/version of the hotend (huge thermal issues with the PLA expanding) and extruder (can't keep the pressure with the non-locking bolt, too much friction with that PTFE-block instead of anything wheel-shaped, too little force transfered to the filament to overcome any minor added friction in the system.)
    No this is not a product for professionals. It's a product for consumers. A *product*! Not an experiment, pre-release or beta-version. A product is supposed to work.
    I buy a saw, I expect it to part things. I buy a drill, I expect it to drill holes.
    I buy a 3d printer, I expect it to 3d print. Maybe not the super-fine details of th really expensive machines. Maybe very slow. But it's supposed to be at the established state of the are of the time it was released at (The certainly was not. It has huge design flaws that countless others had already fixed) and most of all I expect it *to work at all*.
    This isn't 8+ hour prints like I did on my old printer. These are small parts that take 30-90 minutes to print. They are simple. They are small. They are as printable as it gets.

    Seriously, what good is a 3d printer that only prints more or less reliably for 10 minutes at a time and only if you take out the filament, cut off the expanded part and observe very, very carefully if the first 2 layers on the warping and flexing Automated Build Platform are printed. If not, abort at once and do it again. Is that calles an MK6 nowadays? They had YEARS with the Cupcakt to fix these kind of bugs!

    The whole *point of this machine* is to reliably print multiple objects, one after anothr, all night long and eject them using it's Automated Build Platform.
    2012-08-01

    Umbrella flash holder

    This time I modified an umbrella holder designed for 2 E27 lamps.
    With the adapter linked below you can insert 4 lamps.
    With the 3d printed part I designed you can now also mount a flash in the center via a hot shoe.
    This way I can use my umbrellas for really strong video lights AND for battery or mains power operated flashes. Depending on the need.

    3d printed GoPro lens cap

    The lens of the GoPro is well protected inside it's water tight case.
    However the case also has a lens and that one has no protection at all.
    To make sure it doesn't get all scratched in the bag, I designed myself a lens cap that friction fits onto the GoPro.
    Of cause that cursed Thing-o-Matic failed during the print...twice. So 2x4 layers in the middle of the print are more or less missing.