2012-10-20

Vising San Francisco for Google Mentors Summit

As a mentor in the Google Summer of Code I'm currently visiting San Francisco (Mountain View/Sunnyvale/San Jose) on an invitation from Google.

I'm mostly posting on Google+ up to now, so I'll link the biggest postings here and make this into a proper blog entry later. So keep looking at this posting to see what happens in the next 7 days.


Google+ "twitter like" postings as things happen:
  • Otterbox reacted to my Google+ posting about a small issue on the train to the airport.
  • Discovered I can now access a small number of the many us-residents-only Google services.
  • First day  (Arrival, pool party)

posting being updated as things happen

Preparations

Currency: Ordered some cash from my bank. Informed my credit card company that I'll be travelling and that suddenly using the card in the US is not unexpected behavior leading to the card being locked up in automatic fraud detection.

Internet: As a T-Mobile Germany customer roaming in T-Mobile US is surprisingly expensive. So I originally planned to have a T-mobil prepaid SIM-card shipped to the hotel. This would have worked online if it didn't turn out that they would not accept my credit card. Probably because I the billing address is different. Impossible to enter a non-US billing address. One of the other mentors got me a card in a shop and handed it to me on the pool party after arriving. Thanks for that!

Transportation: Originaly planned for public transport with an online-ordered week pass. Ordered a super shuttle to share with 2 other mentors instead.

Power: Checked all gear to work on 110V AC. Only the electric toothbrush doesn't. One Schuko adapter plug and a smaller one that doesn't carry safety ground.

 First day

 Otterbox: Took a serveral hour train ride to Frankfurt(M) airport. On the train ride the lid on my extremely heavyly used and extremely sturdy Otterbox Defender broke. I posted a short paragraph about it on Google+. Guess what comment I found after arriving and having hotel internet later?
"Otterbox: We might be able to send one of our local reps to bring you some replacement belt clips."
Now that is customer service! Go Otterbox!

Got a tourist guide at the airport. Forgot a tiny, chinese leatherman style tool in my laptop bag. It was supposed to be in the checked in luggage. Had to have the tool thrown into the trash.
Not because of the very tiny knife...but because it had pliers!!!

Met an three other mentor at the airport, taking the same flight. No chance to get to them during the actual flight.

Plane: was cramped. Lots of being buckled in due to turbulences. Having a seat at the window provided for a great view and some photos. I didn't think about the windows being incredibly dirty and having little opportunity to leave my seat because 2 other people would have to wind themself out of their small seats for that.


Immigration: Arriving in the US the waiting line for non-residents for the first of 3 security checkpoints took ages.
I crossed dozens of borders in my live any never had such a bad experience with customs and border control. 3 people handling 4 fully seated panes. A dozen additional stations unmanned.

Hotel: looks nice and small. Pool and fitness room but no saune as you'd expect in a european hotel.
Minor issues with the room (can't figure out how to get the shower to anything but hot+off or cold+on).

Pool party: When I arrived there was a pool party with free food (very spicy), beer and wine. One US made "German style" beer wasn't half bad. Tons of other mentors to talk to but jet lag is a bitch. Got my SIM card.


Summit Day One

Jet lag: It's early in the morning but I can't sleep anymore. Writing this blog post, shower, then maybe I'll try the fitness room...
Finally figured out the shower. You have to turn that thing past cold to reach hot. Simply can't adjust the pressure at all. Very unintuitive. The pool outside is heatet. Had a nice chat with 2 German and one Croatian mentor while swiming off the jet lag. Waiting for breakfast at Google HQ.

Intenet: Tried the new SIM card. Works. 2G is terribly slow. Switched to $3/day for 200MB 4G/3G online. Had to pay $5 for today instead of just the $1 difference. Still unsure about the different understanding that 2G=GSM/GPRS, 3G=UMTS/HSDPA+HSUPA and 4G=LTE in Europe, something else here.
Google Maps on Android switched to miles without asking. Can't make sense of walking distances anymore. Issue is known. There is no way to switch it to metric units. FUCK!!!

TV: looking around the TV channels. I never thought it could be hard to get international news. Except for one documentary everything is so US centric (more so then even expected). Aparently it is considered news that "more and more customers are international..and they use social media".
Less spam about election here and election there in the TV then what I am bombarded with online all the time. (Would they just shut up, elect a president and tell us who it is. DONE. Just like every other country on this planet.)
I am under the impression that being forced to think international in the European Union  was the best thing that could happen to us at home. Since you have to support other countries, languages and currencies (pre-Euro and now still the UK-Pound) anyway it makes no sense to exclude the rest of the world in anything for us. Here it's like the rest of the planet doesn't even exist. Adresses are assumed to contain a state as a mandatory field. Credit cards assumed to have US residential addesses. Adresses have no country field. Phone numbers only one format and no international prefix ever.
Being locked into their own bullshit imperial metrics, AM/PM times and strange date formats (day/month/year) doesn't help.

Swimming: Excersized a bit with a Romanian, then swam and talked with 2 Germans. We are the only people with compatible jet lag to do such a thing at that hour.

Shuttle: to breakfast at the Google Campus was late. There where supposed to be shuttles every 15 minutes starting at 8:00. First shuttle came at 8:45. It was something that could happen only at Google.
The shuttle had Google colored interior lighting and ...Wifi. ...and power sockets. ...and wide tables for laptops. ...and a restroom.


Google Campus: Tons of very creative food. Especially in the BBQ later. Finding the rooms for the sessions took security a lot of extra work because they had to make sure us mentors never wandered into any region of the building where where not supposed to be in.


Visited the Google store but didn't find anything. Usefull things where very expensive. Nice things where Google labeled instead of Android (Sorry, I don't wear company names.), for women or again too expensive.

A great deal of talking with a great deal of very interesting people.
They had some strange birds that took the role of the pesting sparrows, sea gulls or pigeons we have at one. Made some photos but it was difficult to get them in the sunlight to see the shimmering green feathers. They prefered to stay in the shadows.
Didn't get to see much of the campus as where where not supposed to wander around.


Androids: During the lunch break there was supposed to be a group walking to the famous Androids in the garden. I looked and looked but couldn't find that group and missed it. :( Would have loved a photo of me in front of them.

chocolate:  Today we're supposed to bring chocolate from all over the world.


Group photo: I was supposed to bring my camera with the super sharp Leica lens for the group photo.  In the end someone else did it with a very old Canon camera. I did one with mine as well but everyone looked slightly to the left into his camera. He told me, he hopes that everything would be in focus as he used manual focus and 1/40th of a second. I used 1/640th and was further away using the extremely fast and accurate 240fps autofocus to not have this issue.

Best Buy: Went with 2 others to Best Buy. Quite small. They got themself 3 Kindles. I didn't find anything I could use. On the way back we stopped by a pharmacy bcause the spicy food of the last day had caused an allergic reaction. I noticed one thing while shopping:
At home you know the brands, the packaging and colors. So it takes you a glimps and you know what all shelves in an aisle are about.
Here you don't recognize anything. You take a single shelf at a time. The large names don't tell you anything. So you have to actually read the finer print, telling you what the purpose of a thing is of a number of items to know what to except in a shelf. One item at a time, one shelf at a time.
Finally found what we're looking for.

Home Depot: Walked 40min to and 40min back from Home Depot at 20:00. Missed the food (still hurting due to excessive eating). Got myself a very heavy set of thread cutters. 1/2"-13NC, 3/8"-16NC, 5/16"-18NC and 1/4"-20NC. Also 5/32" to 1/2" hex sockets (opposite of the hex keys I already have) and a 15 pieces, imperial, titanium drill bit set. Also 1/4-20 T-nuts (get a metal thread into a wood piece) and 2 small 1/4" threaded rods.
All the tools a metric rebel needs to sabotage imperial star destroyers.


Otterbox: No reply yet. Asked the receptin and they did not get any deliveries.

Summit Day Two  

Yosemite: Have to pack everything and check out before heading for Google.

Otterbox: Got an email (on a sunday!!!) asking about where to meet to get a replacement belt clip. They are leaving it for me at the hotel reception (in person) as this is the simplest option given my travel arrangements. I've never seen such a great level of customer service. I didn't even ask for such a thing. I just mentioned the accident on G+ and they suddenly asked me.

Android: Had a few minutes for myself and finally managed to do self portraits in front of the famous Android figures. ...in 3D!

Group: Looks like we are now 5 instead of 4 people. 4 indians, 1 belgian and myself. Quite interesting to talk about bollywood movies with people from india. :) Got a slightly bigger car. Else our luggage would hardly fit.

Trip: Jet lag kicked in hard. I could only navigate using the phone but not drive. Stopped by at a Red Robert burger on the way. Ice tea was bad and the burgers took ages. On the wall they had hung up everything they could find in terms of images. Keith Herring next to Mickey Mouse next to Leonardo Da Vincy next to 1960th advertisements.

Yosemite Inn: Free Wifi and it looks like they have the same strange shower controls where you can't change the temperature and amount of water independently. Will have to get used to that.

Yosemite on Monday

Jet lag: Finally seems to get better. Was able to sleep again after waking up way too early.

Breakfast: Very basic self-service breakfast in the Inn...but they had DIY waffles!!!! :)
Thinking aout river rafting but the weather is very cool and rainy and it's quite expensive. Planning what to do all day in this weather.

Yosemite: It rained all day and the fog was obscuring the higher mountains. Still took a metric ton of 2D and 3D photos. Quite impressed that the deer are not minding the people at all. They literary graze next to you and walk past without giving so much as a glance to the noisy tourists.

Cabin: Registration desk hat free, hot chocolate!!! Splitting up into 2 cabins at different parts of the camping ground. Taking all food and food packaging out of the car (bears). Cabin is small but warm.

Fireplace: There is a central cabin with interet and a large fireplace. Very cozy. It has free wifi but someone seems to be taking up all bandwidth. Trying to split up the cost among our group. While all the others are calculating, I'm writing this blog post and comparing Mtn Dew diet vs. regular. ...tastes completely different to the one we have in Europe without the corn syrup.

Otterbox: Just got a mail that the one I ordered from Amazon (as a first reflex before blogging about it) arrived just after I had checked out. It will be returned to sender as Otterbox has offered a free replacement and just delivered it to my hotel for the nex day in person. I've never seen customer service like this.

Sweets: trying my way through the world of local sugar bars. Butterfinger gets stuck in your teeth, Hershey pretty dull. KitKat is smaller then at home. I like the larger M&M made of corn.
Lacking the time to test local beers and wine properly.

OpenStreetMap: no cellphone reception, so I collected a GPS track of the hiking trail to mirror lake.  Compared it with the map later. Turned out OSM was very accurate. Will see if all tents exist in Camp Curry and if they have their number tagged as addr:housenumber.

Pizza: Later that night we had Pizza in Camp Curry. We could eat inside but you had to go outside to order.  While waiting I imported the photos of the day into my laptop.... Had to free up space multiple times.

Lodge: At the lodge the lock to the communal showers was broken ans the two power sockets where so close to each other, that I could not fit adapters for German power plugs into both at once. Lots of additional blankets provided. Very cozy.
Wrote some postcards for the folks at home. Hope it's no problem that I added the Yosemite stamp on them way outside the stamp area.

NASA AMES on Tuesday 


Woke up: Way early again. Shower and typing this Blog posting. Jet lag seems to be getting better. At least it's a reasonable 6am and not 2 or 4am anymore.
Weather conditions will determine what exactly we can do today regarding Yosemite and NASA.

Sorry, NASA AMES had to be canceled.

Frys:  Driving incredibly slow (compared to Germany) on endless, boring, straight roads. Skipped NASA but not skipping a visit to a Fry's electronics shop.
Cool toys at reasonable prices but way too large for airport luggage. :(
They only have a few Canon and Nikon lenses. No Panasonic or Olympus lenses at all.
One interesting travel-tripod but without an equally lightweight head that's a mood point.
Most interesting stuff requires mains power (110V US-plug) or is too large or too heavy.
Nice electronics meassurement tools but too expensive and again, 110V and too large/heavy.
Got a nice leatherman-style mini-tool with integrated flahslight.  Will have to create a belt-pack for it myself as none is included. I expected to find more interesting stuff. :/

Otterbox: They have outdone themself.  I expected a replacement belt clip at the reception. Instead I got a whole Otterbox backpack, 2 belt clips and 2 new silicone cases as well!!! I can't believe customer service like this exists. Don't forget that I didn't even ask them but just mentioned the small mistake in a Google+ posting. ..that they replied before my plane even landed. And that I got a response from a local representative on a sunday! You Otters rock!!!

Wednesday in San Francisco

Woke up way early to get to the Golden Gate Bridge at sunrise.

Headache...I should sleep, eat and dring more. Something else then testin my way through pop tarts, softdrinks and hamburger chains could be a good idea.

Wanted to try Google Wallet payment at a Radio Shack in San Francisco but being a German I don't see the Google Wallet App in Android Market.
Google Play *does* show me the current edisode of MythBusters and has  a buy-season button because I'm in the US... but it doesn't accept my German Credit Card for payment.
#USOnly sucks. Especially if you are in the US but still can't use it.

Submarine: Taking my flash to visit the submarine at pier 43. Very simple design but surprisingly comfortable. Much more so then the German submarines I've seen. Very well lit too. Flash not required at all.

Thursday in San Francisco

Cash: Out of cash in the morning. I don't have my PIN code for the Mastercard to get any. Cashback in shops requires the PIN too. Changed 10eur at a heart stopping rate of 1:1 instead of 1:1.35 at Pier39.

Aquarium at the bay: Opens too late (at 10:00). Must skip this. Should have checked this earlier. My mistake.

USS Hornet: Bus more expensive then expected. Just enough cash to make it if I take BART via Credit Card for the way back. Got a tour of the island+bridge+admirals quarters. Very simple technology but then again, this is a WWII aircraft carrier made in the US.

Noisebridge: OMG, OMG, OMG!!! I've never seen a hackerspace this large! Electronics area, kitchen area, 2 lecture rooms, sewing area, member boxes, ... . Found out that despite asking on the mailing list, German Corner was yesterday an not as advertised. By chance a number of German speakers and learners showed up anyway and we had a great night. Fixed my cach issue by buying cider with my CC and everyone paying their share to me in cash.

Google Play: Found a $25 gift Mastercard in a late night store. Finally a way to pay my Mythbusters and see if that purchase stays valid when I leave the US. Result here.

Leaving on Friday 

Breakfast: Decided to spoil myself on this last day in SF.  "NY style" cheese pancakes with strawberries and cream. Also gingerbread hot chocolate.   ...no way to eat it all. Way too much food for a single plate.

Checkout: Took a massage chair at the hotel to loosen up my muscles as much as possible before carrying the heavy bag and sitting still for 12h. Prepared all receipts and a piece of paper with the sum in USD and EUR (using the official customs exchange rate for this month) to speed up customs when entering Germany again.

Airport: Security is very fast. Only a few seconds per person. No problems. Luggage is at 30lbs. 40 is included. No problems there too despite the heavy tools.

Internet: OMG! SFO has free Wifi and power plugs!!! Problems using it on the smartphone to download the Mythbusters videos I purchased but seems to work on the laptop. Can't free enough space on the laptop to download them. :( Precaching at least on of the 3 episodes on my laptop. Hope this works.


2012-10-02

Vespucci - Android OpenStreetMap editor version 0.8 released!!!

New version 0.8 of the vespucci OSM editor released in Android market.

* New Honeycomb style Action Bar user interface, even on pre-HC devices.
* New EasyEdit editing mode that unifies all previous editing modes (which are still available for now) into one mode.
* Support Undo/Redo.
* Show way direction.
* Support way reversal and deletion.
* Add JOSM preset support in tag editor, customisations can be added.
* When tracking position, the direction you're pointing/travelling is shown.
* Export GPS tracks as GPX files.
* Transfer/Other Location shows coordinates of last location.
* Allow installing to SD card.
* Allow nothing as a background, drop Osmarender.
* Allow downloaded data to be saved as a JOSM-compatible OSC file.
* Add support for Croatian, Danish, Japanese, Norwegian, Polish, Spanish, and Russian languages in addition to the existing Czech, English, French, German, Hungarian, and Italian languages.
* Add crash error reporting using ACRA.
* Support alternate OpenStreetMap API servers.
* Many other bug fixes and improvements.

Update: We had(have?) some issues with Android Market handing out the old 0.7 version instead of the new 0.8 and 0.8.1 .


2012-09-27

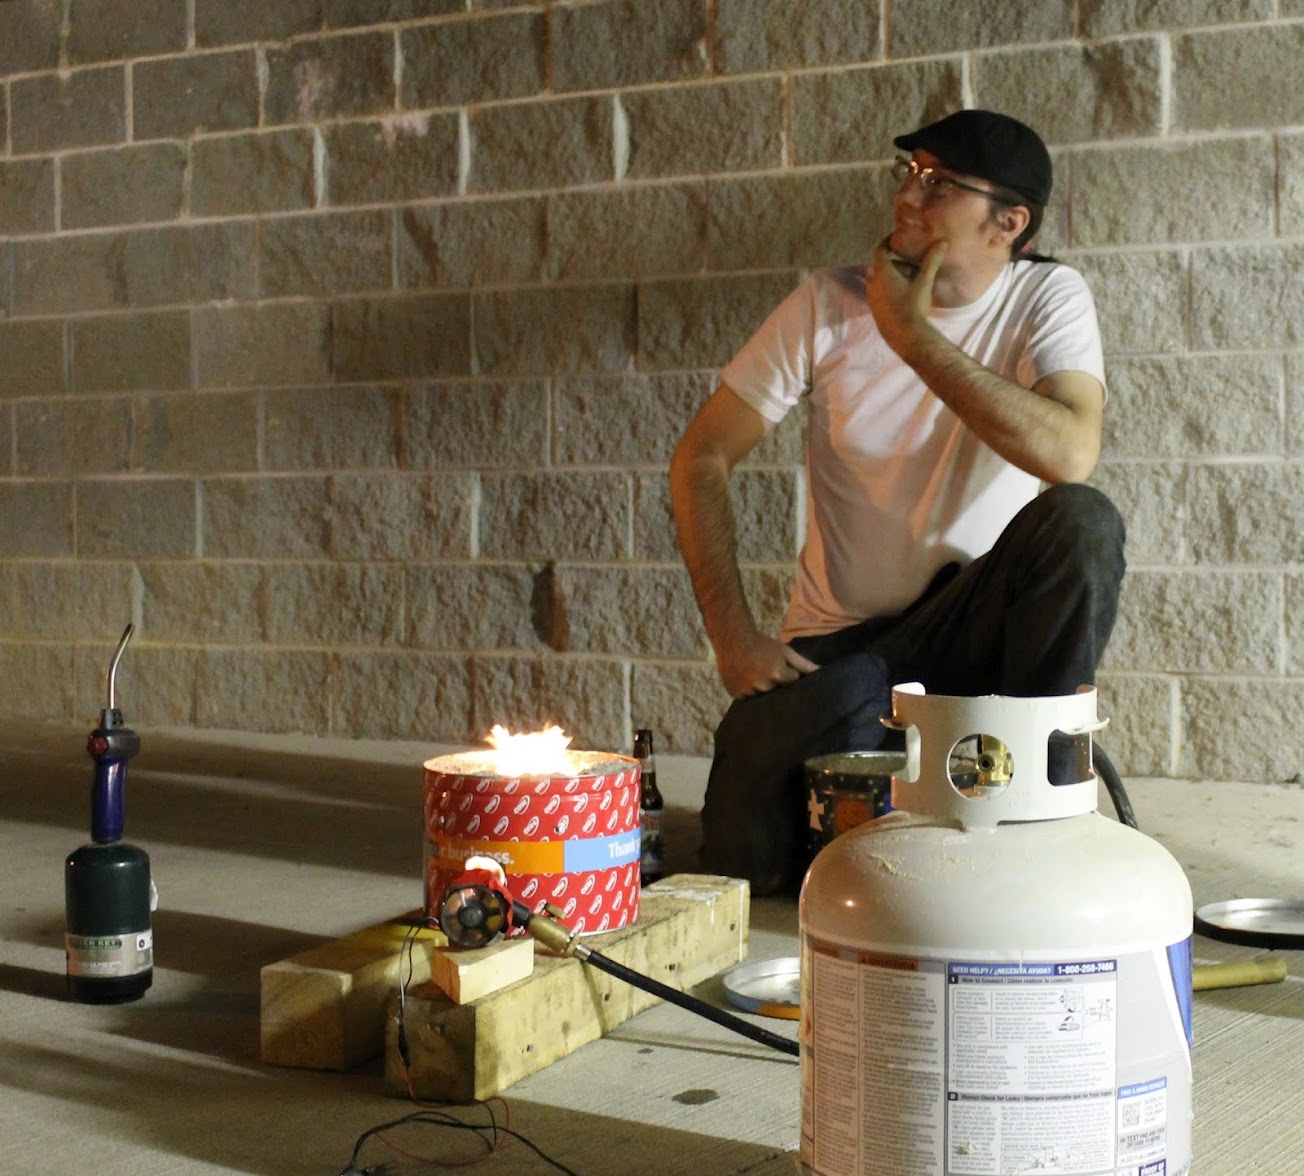
Lost wax^M^M^M PLA casting


After Jeshua tried lost wax aluminum casting but with 3d printed PLA I was sceptical if this was within the possibilities of a DIY project.
The equipment he used looked like it was only feasable if you worked at a steel melting plant or something.

Now David Knaack posted some photos of James Harr and Brandon Norris of the Omaha Maker Group doing the same thing but a way more low-tec way. I'm quite impressed. (Photos below)

 And yet another such casting. This time by David Knaack casting a RepRap filament drive gear from aluminum.

The process is:
  1. make a positive master model (here a 3d print)
  2. carefully cast plaster around it. Avoid trapped air.
  3.  place in a furnace to get all remaining water out of the plaster and burn off the PLA.
  4. slowly pour molten aluminum
  5. wait for it to cool. Expect the aluminum to shrink


2012-09-26

Mount a NERF gun to a NERF gun ...with ammo.

I heard you liked NERF guns, so I designed a mount so you can mount a NERF gun to a NERF gun.

Tweaked NERF Dual Gun Connector by dfb
  • added ammo holder for 4 rounds
  • added center ramp for locking in place
  • ammo holes have a flat side and a pin to hold the ammo securely


2012-09-25

3d printed 45mm fan grill

I replaced the fan on the Thing-o-Matic extruder because I had my fingers in it one to many fimes (when checking the filament) and there was only 1 fan blad and 10 fingers left.
But that thing is 45mm and no shop here has anything between 40mm and 50mm.

So I made a custom one.
It's parametric, so you can change the parameters fan_size and bolt_size for different sized fans.


3d printed vacuum cleaner attachment for CNC spindle

I designed a 3d printed attachment to the spindle of my CNC mill for a vacuum cleaner to suck in all the chippings created.
It's still a work in progress and has not been tested.
I'm waiting for the (sound-proof!!!) shop-vac to arrive first.

2012-09-24

Lost PLA aluminum casting

This is so cool!
Jeshua 3d printed some mechanical parts in PLA and then did the same process others would do with wax in lost-wax-casting to get an aluminum part.
Doesn't looks like anything you can do at home. :/
I guess I rather have to mill blocks of aluminum instead.

2012-09-21

Githubiverse - Github template for 3d designs

 In the wake of yesterdays "Occupy Thingiverse" happeningsm I learned about "Githubiverse".
A Gitput page template for 3d printed object designs.
Check out the test page!
This looks very neat!
Add a way for tagging and indexing projects and you have a really nice start.
Especially as you get versioning for free.
Something Thingiverse was always lacking.

Update: Looks like Thorsten Paul made some progress. You can now have and navigate multiple things. Check out the "Designs:" section at the top.

2012-09-20

3d printed camera slider manufactured


So yes, I actually got around to making one of my completely over-engeneered 3d printed camera slider edges.
The other one is currently in the printer.
Prints fine. Does the job. :)
Now I'll probably also design a better center piece.
One that grips around the LM8UU. So they can't slide out one end.
With additional 1/4" atachment points.

Occupy Thingiverse?

When I woke up, my RSS reader showed some "occupy thingiverse" things posted on Thingiverse.
I'm still trying to figure out all that happened while I was sleeping.

The timeline seems to look like this:
(As the list becomes longer, I'm starting to highlights the latest entries for the benefit or readers returning.)
  1. July 2010 - RepRap blog posting about the heated conveyor belt
  2. August 2011 - Makerbot Industries receives $10M venture capital funding. Applied for patent on heated conveyor belt.
  3. November 2011 - Makerbot Industries filed for a patent on a heated conveyor belt.
  4. February 2012 - New TOS of Thingiverse
  5. Thingiverse blog post about the TOS. Only one commenter "madscifi" asked about the 3.2 attribution clause but wasn't answered.
  6. July 2012 - Makerbot gets the patent. Their own design is highly flawed and no longer included in the next 2 generations
  7. September 2012 - Replicator II announced as a closed source design. 
  8. September 2012 - Blog posting about the Replicator II being closed source, later added TOS change by Josef Prusa (Twitter)
  9. Included ".thing" file format turns out to be just a .zip of multiple .stl and .obj files to be printed.
  10. "Occupy Thingiverse Test cube" posted on Thingiverse, more attention to TOS
  11. Josef Prusa Google+ posting
  12. Tony Buser (Makerbot Industries) posting on Google+ that the TOS didn't chance in 8 month. 
  13. Thingiverse blog post, clarifying that the TOS change was in february 
  14. First thoughts about developing an alternative to Thingiverse. (0,1,2,3,4,5,brainstorming,cubehero,githubiverse,Thingiverse2Github converter, SKDB)
  15. More "occupy Thingiverse" objects popping up all the time.
  16. The story got slashdottet
  17. Blog posting by Makerbot Industries- They are "working out" just how open source they can make the Replicator II, lots about their intentions, no clear work about the specific TOS sentence.
  18. As a response the blog post by Josef Prusa gets updated. 
  19. Thingiverse replacement taking some shape in the comments of a G+ posting. Who wants to contribute? Alternatives are seldomly a bad thing.
  20. Reaction of Hoeken (RRRF and formerly MBI) 
  21. Hackaday posting about it 
  22. It looks like at least the software is just a thin, closed source UI that calls open source Skeinforge or their new (open source) "Miracle-Grue".
  23. This blog entry is on Hacker News and visitor numbers explode. I'm trying to stay more non-POV here.
  24. Looks like the new closed-source software can be tricked into working with older MBI printer. 
  25. New phrase coined "Makerbotgate". 
  26. Adrien Bowyers (RepRap) views on open and closed source printers
  27. We hit 13'000 visitors on this blog posting 
  28. Make Magazine blogs about the Closed Source issue for the second time
  29. Some interesting posts by Openalia
  30. CNET interviewed Josef Prusa, waiting for response from MBI before publishing.
  31. New Blog post from Makerbot Industries 
  32. Blog post of Josef Prusa gets updated
  33. So does Openalia
  34. MBI goes to explaining the TOS  crossposed in the Thingiverse blog 
  35. CNET interview with Josef Prusa, quoting Zach "Hoeken" Smith now online 
  36. Make magazine inverviews key players about this issue 
  37. Bre Pettis talk "Challenges of Open Source Consumer Products" on the Open Hardware Summit is recorded on ustream (session 3 at 1:20) Josef Prusa is in session 2 at 1:28 . 
  38. Make magazine has a transcrips of the Bre Pettis talk. 
  39. We hit the 15'000 reader mark while I was on vacation.
  40. ...
So it seems that:
Makerbot Industries, owner of Thingiverse updated their TOS.

Previously they had a paragraph
"Thingiverse.com does not claim ownership of the materials you post, upload, input or submit to the Thingiverse.com site."
The current TOS states a lot of granted rights but they are all limited to
"solely for the purposes of including your User Content in the Site and Services".
Seems fine to me.

What is interesting is the next sentence:
" You agree to irrevocably waive (and cause to be  waived) any claims and assertions of moral rights or attribution with respect to your User Content."
I can't find a reason for this one in the february blog posting about the TOS.
The recent blog posting reassures us that attribution is done. In the latest blog post by their lawyer the moral rights part is explained as being able to create conflicts with the chosen Creative Commons license and the license given for the specific purpose of hosting the design on Thingiverse at all.

Of cause being legal language of a foreign jusisdiction and one based on common law (wich is still a very strange concept to me), I may misunderstand this part.
It seems that moral rights in the US are separate from copyright and thus not affected by Creative Commons. However why whould you waive any but the "right to the integrity of the work"? Why the moral right of attribution, of anonymous and pseudonymous publication?
Can you even do that if you are not the only author?
  • Can a person from a country such as German where waiving your moral right or attribution is by law impossible even use Thingiverse? (I think yes but I'm no lawyer.)
  • "Thingiverse ... and services" can include any future service. (But that is nothing to deal with now.) “ - "Company provides a service for users to share digital designs that can be printed on 3D printers to create physical objects”
  • How do the two licenses granted in the TOS work out if you are not the (only) author?
It didn't get much attention back then.  Due to the next thing it did get a lot of attention now:

The second thing that happened is that a "Replicator II" was announced and that it was widely seen as closed source.
I'm fine with it being closed source. (As long as they finally start to behave like it's a product that has support and warrenty and is supposed to work and if it doesn't work reliably it gets repaired, recalled, refunded or reimbursed.)
I'm not fine if they used designs that where published with Creative Commons Share-Alike or Attribution (or plain GPL) because none of these two seem to happen. Inheriting from the "Replicator" and thus from "Thing-o-Matic", "Cupcake" and lots of Reprap related designs this is very likely however no such violation is found as of yet (no one has a Replicator II yet) and there is only a very vague reaction about this part from Makerbot Industries.
The latest MBI blog posting states that they are working out "how open source" they can make it.
After that I got a statement that the software  is just one thin, closed source GUI. Also the new .thing file format is not only just a renamed .zip containing standard STL and OBJ files but also some JSON about the placement of these objects in the build volume. A libthing for using it will probably be published.
No word about design files of the hardware.

We'll have to see what parts and how much of the hardware will be in the open source and what exactly the license will be. The software part has now been answered.

It is very interesting to follow the different reactions and strands of discussions popping up and causing wider and wider ripple on the internet.


This posting is being updated as the events unfold.
If you find errors or inaccuracies in this posting, please contact me.

2012-09-19

Things to Visit in SF/Silicone Valley after the GSoC Mentors Summit

...just keeping notes here.
Doing this on Google+ would mean that they scroll off screen too fast.

Friday:
  1. Arrive
  2. Public Transport (San Francisco Municipal Transportation Agency? BART?)
  3. GSoC Mentors Summit
Saturday:
  1. GSoC Mentors Summit
Sunday:
  • Enough time to visit Silicone Valley?
  • What to see there? (1)
  • Computer History Museum already closed 17:00 (PDP-1 and copy of Difference Engine Nr.2) " only open only on Saturday 11 - 5, and Sunday 12 - 4. It is a 15-20 minute walk from Google"=>wouldn't work anyway
  • NASA Ames?
  1. GSoC Mentors Summit until 17:00
  2. Be in SF to check into the second hotel. (Where to store luggage after checking out?)
Monday:
Tuesday:
Wednesday:
Thursday:
  1. Visit Noisebridge for "German corner"
 Friday:
  1. Travel back home 
Unknown day:
  1. Golden Gate Bridge
  2. Al Catraz
  3. Pier 39/Fisherman's Warf
  4. Ride the Cable Car ;)
  5. Yosemite? -> asked other mentors to go together.
  6. Techshop  DIY workshop
  7. USS Hornet

 Links:

2012-09-16


Designed an improved side for the LM8UU (8mm linear bearing) based camera slider Matt Roberts designed.
Improvements:
  1. can be mounted on 1 or 2 tripods
  2. More stability by center 40x10mm L profile
  3. 1/4" UNC camera accessories can be mounted to it
  4. All bolt holes tapered for easy assembly
  5. All human touchable edges rounded to make it nicer to touch
  6. 8mm rods secured by M3 grub screws

2012-09-15

RS485 CNC spindle control

My USB to RS485 adapter just arrived from China.
Will be able to test controlling the CNC spindle from the computer by MACH3 later today! 

Setting:
(remove tape from taped over keys,
 then press PRGM, enter the number of the value to change via UP,DOWN and <<, pres SET.
 You now see the current value.
 enter a new value via UP,DOWN,<< and press SET to change it.
 The device will leave PRGM mode on it's own after a few seconds)

PD163 "communication address"  1
PD164 "baud rate" 1 = 9600bps
PD165 "communication data method" 3 = 8N1 For RTU4
0=8n1 ASCII gives errors in Mach3 (don't know how because it's a one-way only communication)
3=8n1 RTU4 gives no errors but still the spindle doesn't react
PD001 "source of run commands" 2 = communication port (0=operator)
PD002 "source of operating frequency" 2=communication port (0=operator)
now it should work.

PD144 "rated motor revolutions" default=1440

Arduino ADC confusion

I don't get it.
I want to meassure 1g-200g with an  #Arduino .
Alexis Wiasmitinow made me a PCB using the
http://www.robot-italy.com/it/3132-micro-load-cell-0-780g-czl616c.html
750g load cell and an op-amp with adjustable gain and offset.
When I place a 150g load on the cell it sometimes increases *or decreases*.
When I remove that load it sometimes doesn't return to the value it had before.
When I adjust the offset to get very small values with no load placed on the load cell, I get no change in the value at all. With higher offsets I get value changes depending on the gain.
But never more then 3-4 bit of resolution .
I'm using pin A1 on a Arduino with the LCD-Keypad shield connected (shield uses A0 and 4-10).
http://www.robotshop.com/dfrobot-lcd-keypad-shield-arduino-1.html
Any idea?

Update: We solved it via Skype chat (G+ hangouts only produced "server error" and "severe server error".)
I simply had my load cell mounted the wrong way. My load was in the wrong place!!!

2012-09-13

WIP: camera slider

I'm currently trying to make a 3d printable camera slider design made by mattroberts and then improve on it.
Problem is: I have LM8UU bearings but one of my 2 8mm rods...is not 8mm but more like 8.05mm .
The bearings get stuck.
I'll try to get it replaced on monday and do an extensive posting once I have made it work.

2012-09-12

3D printing again

Being so occupied with the new CNC milling machine I haven't 3d printed anything in a while.
So here I am, printing mounting brackets Ryan designed to attach my new limit switches to the CNC mill.
I had lots and lots of issues with filament expanding and blocking on my Thing-o-Matic.
So this time I tried something new. I lowered the PLA temperature from 200°C to 185°C .
I still need to watch the whole print and instantly react when the filament stops to come out or the drive bolt starts to grind on the filament instead of transporting it. But so far I have 30 minutes of productive printing.
Formerly it would hardly do 10 minutes without major issues.
Still a *long* way from actually using the ABP to print a batch of objects while I'm sleeping...

2012-09-11

Super cheap logic analyser

Just got my <10eur logic analyser.
No idea yet how many samples it can actually hold.
They didn't tell.  ;)
  • software "USBee AX (Standard, Plus and Pro)" 


New drill arrived too - adding end stops to YOOCNC CNC6040

My new drill arrived too!
(The cheap, old one broke down so I got myself a real good one.)
Finally I can mount the end stops to my CNC6040 milling machine.
If it looses steps and I can stop it in time before the blank gets damaged,
I should then be able to resume a G-code program.
(Without eye-balling or edge-finding  known location to get the current position calibrated again.)

Milling bits arrived

After 22 days from China.
Now I can prepare some blanks and finally test fine detail 4 axis milling on the YOOCNC CNC6040...
Wish me luck!

2012-09-08

YOOCNC CNC6040 up and running well

The CNC6040 is now up and running very well.
I just purchased my license of Mach3 and will probably get the hobby version of DeskProto too.
No longer loosing steps and now with a flat and wide machining vice mounted to the table to mount blanks at defined locations.

Haven't tested the 4th axis yet. At least not beyond jogging it manually to see if it moves.

I'm still running the chinese electronics and cables. These will be replaced with shielded cables and a Gecko G540 at some point but not right now. (Paying for the machine and the 2 software licenses is enough for the the time being.)
Now I'm waiting for some cutters and an 0.001mm dial gauge and my new drill to make the holes for mounting the end stops in my pocket.

2012-08-26

That's how you mount things

Got a real big vice to quickly mount blacks onto the CNC router.
Found it for cheap on Ebay.
Much faster then working with T nuts even for the small parts.
Also got my edge finder.
Purely mechanical one. The ones that can use the probe input of the machine cost a fortune.
:(


2012-08-25

First CNC milling

Got down to business with my CNC mill.
X and Y axis sometimes skip steps.
Slowing down helps only do far.
T slot tables are really good at collecting shavings.
Spindle doesn't run as hot anymore.
Was probably just the hot weather outside.
Milling much faster and deeper then in the first tests now.
Still need to add end stops.
My 6mm CNC edge finder arrived.
Will have to play around with it

2012-08-22

RS485 spindle control

Ryan Matthews found a way to control the spindle of the same YOOCNC CNC6040 mill I have via RS485.
So I just ordered myself a USB-RS485 adapter.
Let's just say that I don't recomment the "ColorApples Cool Gadgets Mall.". Their Paypal checkout process is broken beyond repair.
(I'm doing these postings mainly for my self, so I can find these links without digging through my Google+ history.)

    2012-08-19

    First tests of CNC milling


    I got it to mill my first test models from the CAD program down to executing the toolpath on my new CNC mill.
    I used:
    • the demo version of MACH3 (limited to 500 lines of g-code and a low speed. carving-cnc had a printout of the settings.)
    • Deskproto 30 days eval version. (4 axis version is nearly 1000eur. It's really nice to work with but I won't use this after the 30 days. Just too expensive.)
    For MACH3 I found that I had to calibrate the steps/mm (settings tab, lower left corner).
    The supplied settings where moving about 150% of the intended travel. So e.g. G1 Y100 moved to 158mm .

    Lessons learned so far:
    Things that default to imperial units suck.
    Ok,.imperial units suck in general.
    A spindle is very good at heating up a full bucket of water in no time even at minimum speed.
    I need better clamps to fasten things to the work table.

    2012-08-18

    Mounting 4th axis

    Now there is a problem.
    I wanted to mount the 4th axis below Z=0 to mill parts with a diameter of 12cm plus a core.
    The machine only has 6cm of Z travel.
    That sled of the Y axis is a problem...

    Cnc6040 assembly started


    Just moved everything into the workshop and tried to start assembly...
    ...this is going to take a long time.
    The machine was very well packaged and this was badly needed. One edge of the really heavy work table got bent out of shape in transport.

    Assembly is straightforward.
    Nothing was missing.
    Tools required:
    1. 0.8x4mm standard screwdriver
    2. metric 3,4,5 and 6mm hex keys.
    Status: IT WORKS.
    I can jog all 4 axis with and without the spindle running at full speed and I can see the probe working too.


    2012-08-16

    CNC6040 arrived!!!

    Guess what else arrived?
    My chinese YOOCNC  CNC6040 milling machine!
    I expected to wait another 3 weeks for this and just got a call from some DHL guy that he's waiting with some really heavy package at my door.

    Didn't fully unpack it yet. Just peeked inside. Looks fine.
    Will drive it home to my workshop tomorrow and hopefully set it up this weekend.

    LM8UU for camera slider

    Just received 4 LM8UU sliding bearing to make myself a really nice and dirt cheap camera slider using one of the 3D printers. :)
    For some obscure reason these simple things are sold for an arm and a leg.

    2012-08-13

    CNC6040 - electronic nigthmare


    Yes, this piece of junk is exactly the machine I just ordered for myself a few days ago....
    Mechanics are cool but the electronics and cabling have to go. Period.

    2012-08-11

    Biometric passport for Google Summer of Code summit

    I couldn't avoid it any longer.
    The government gets my fingerprints on file.
    I have a chance to fly to Mountain View to represent Open Steet Map because I am mentoring a student in the Google Summer of code.
    (He does really great.)
    At this point its just a chance.
    There are others and the budget for travel of non US residents is limited.

    Wish me luck!

    ready to go mechanical platform for 3d printer

    http://www.automationtechnologiesinc.com/products-page/3d-printer/3d-printer-mechanical-platform-no-controller

     ...if this used trapezoidal spindles instead of M8 threaded rods and I didn't have second thoughts about an overconstrained Z-exis, this would be tempting.

    Milling wax test on the RepMan

    First test of milling wax (on the RepMan, because my CNC mill takes a few weeks) are super positive regarding the wax and negative regarding the Repman.

    I can cast blocks of Wax very easily and milling them even with just a Dremel and a RepMan 3D printer is like milling soft butter.
    However the RepMan has an issue of homing at the start of a new g-code file even after doing the firmware upgrade to support G91=relative coordinates.
    So you can't position it at a fixed point on the surface of your object (possibly using a probe to find just the height of the surface and just the edges or the center of a hole) and start milling right there. You have to meassure and change all the coordinates in your G-code to that offset because you have only global coordinates.

    2012-08-09

    CNC mill


    Just ordered myself a chinese CNC mill. Model "YOOCNC 6040Z+S80" from "carving-cnc".
    I thought GoCNC first but they use threaded rods instead of even trapezoidal spindles and employ Dremel and Proxxon as spindles. This one used a ballscrew and comes with a water cooled 1.5KW drive.

    I know, it won't be a high end device. It can barely do metal but it should be sufficient for light wood, acrylic and wax with it's supplied 1.5KW spindle.

    So far I found out that I have to check the following:
    1. Check for loose bolts and righten everything down.
    2. Mill a perfectly flat bed. 
    3. Check grounding and cooling on all electronics.
    4. Replace stepper-wires with shielded ones.  Test all stepper wires for broken ones.
    5. Add 2 end stops for each axis. (pins 11,12,13) with a 500 Ohm resistor from +5V to pin 15
    6. Add a probe input (pin 15)
    7. Insulate the spindle from the case to avoir random interference into the x,y,z steppers. 
    8. Check heatsinke for the possibility of them creating shorts due to not being deburred. 
    9. "I then read the download manual that came from site and all configurations seemed correct, until I downloaded a Mach3 manual which show that in the configurations the dir pulse is active high and should be active low, note when you change this you will need to reverse direction of motor, as it changes direction." 
    10. Add a connector for a probe
    11. Replace the water hose and pump. Check the original hose for kinks.
    The plan is to  use this for parts that are difficult to do on the 3D printers or require materials I can't print or print molds for.
    I'll post about the progress and issues with this machine under the tag "CNC", so others can read up on how these machines perform and where they fall short.
      • CamBam looks line to start with but doesn't support the 4th (rotation) axis.
      • deskcnc (how to buy just the software?) and
      • deskproto (995eur for multi-axis version) have a 30 day trial and can do this 
      • MecSoft FreeMILL seems to be limited to carthesian 3 axis but is free
      • PyCAM also 
      • GcodeGenerator runs from inside Blender 
      • maybe enhance this Java software to create 4 axis g-code for following the surface normal 
    Things to get:
    timeline:
    2012-08-08 ordered and payed via paypal (so I can dispute and get my money back if they don't ship)
    2012-08-08 no order confirmation but a hand written email with details about the shipping process and customs
    2012-08-16 Machine arrived !!!

    specs:
    X,Y,Z Working area:  580×380×60mm
    Max. Feeding height: ≤100mm
    Outside dimension:  880×660×520mm
    Table size: 745×480mm
    Lathe structure: 6061/6063 Aluminium alloy
    Stepping motor: two-phase 57/3A (2.2-2.5mH inductance)
    Drive unit: 1605 Ball screw
    Sliding unit:: Chromeplate shaft
    Maximum speed: 0-4000mm/min
    Engraving speed: 300-3000mm/min
    Repeat positioning Accuracy:  0.05mm
    Spindle: 1500W VFD spindle motor
    Spindle speed:  24000rpm
    Cutting tool-holder: ER11-A: 6mm and 3.175mm( =1/8" )
    Interface: Parallel port
    Software Compatability: Mach3/Emc2,(Type3,Wentai, ArtCAM)
    Command code:  G code/.nc/.ncc/.tab/.txt
    Weight:  55kg
      

    2012-08-07

    Where Google Latitude fails

    Just a quick list about Google Latitude and in just how many ways it fails:

    • The Android App can send but not receive or accept/decline friend-requests.
    • You receive Friend-Requests in Gmail. Talk about mixed media.
    • Clicking on the link in Gmail shows "Your browser is not supported by our webpage" (It's a mobile Firefox).
    • Clicking on the link in Gmail and selecting to open it with Latitude brings up an empty Google maps. Nothing about accepting a friend request.  Not even opening the Latitude part of Google Maps.
    • Checking in, you get a top-10 of your G+ contacts. You can't add or even click any of them.
    • You can't add them manually *at all* because you can only add people by email and you don't get their email adresses.
    • After checking in... you don't see who of your friends checked in too. So you can't go looking for them wich is *the point* of Latitude. You're not checking in to add reviews and stuff. That works fine without Latitude.
    • 3 phones of 3 people next to each other. Each phone shows a different combination of each one's checkin-status. None of the 3 phones is right.
    • New friends don't apear when you click "update". They suddenly apear when you close and re-open the Latitude part of Google Maps.

    2012-08-02

    Thing-o-Matic rant

    DAMN THIS CURSED ABDOMINATION OF A -O-MATIC !!!
    3 prints failed 6 times. That darn extruder stopping to extrude any more plastic. I damn need these parts until tomorrow.

    IF you happen to be in front of the device and notice it, you can lower and then raise the pressure mid print but if you missed it because it's serveral 30-45 minute prints, you are ****.
    There is no real pause+resume where the head is raised. No way to decrease speed, go back a few skipped layers, alter the extruder-RPM and/or temperature mid-print. You are just **** .

    With the Replicator out there is no hope that Makerbot industries will ever release a bugfixed upgrade/version of the hotend (huge thermal issues with the PLA expanding) and extruder (can't keep the pressure with the non-locking bolt, too much friction with that PTFE-block instead of anything wheel-shaped, too little force transfered to the filament to overcome any minor added friction in the system.)
    No this is not a product for professionals. It's a product for consumers. A *product*! Not an experiment, pre-release or beta-version. A product is supposed to work.
    I buy a saw, I expect it to part things. I buy a drill, I expect it to drill holes.
    I buy a 3d printer, I expect it to 3d print. Maybe not the super-fine details of th really expensive machines. Maybe very slow. But it's supposed to be at the established state of the are of the time it was released at (The certainly was not. It has huge design flaws that countless others had already fixed) and most of all I expect it *to work at all*.
    This isn't 8+ hour prints like I did on my old printer. These are small parts that take 30-90 minutes to print. They are simple. They are small. They are as printable as it gets.

    Seriously, what good is a 3d printer that only prints more or less reliably for 10 minutes at a time and only if you take out the filament, cut off the expanded part and observe very, very carefully if the first 2 layers on the warping and flexing Automated Build Platform are printed. If not, abort at once and do it again. Is that calles an MK6 nowadays? They had YEARS with the Cupcakt to fix these kind of bugs!

    The whole *point of this machine* is to reliably print multiple objects, one after anothr, all night long and eject them using it's Automated Build Platform.

    2012-08-01

    Umbrella flash holder

    This time I modified an umbrella holder designed for 2 E27 lamps.
    With the adapter linked below you can insert 4 lamps.
    With the 3d printed part I designed you can now also mount a flash in the center via a hot shoe.
    This way I can use my umbrellas for really strong video lights AND for battery or mains power operated flashes. Depending on the need.

    3d printed GoPro lens cap

    The lens of the GoPro is well protected inside it's water tight case.
    However the case also has a lens and that one has no protection at all.
    To make sure it doesn't get all scratched in the bag, I designed myself a lens cap that friction fits onto the GoPro.
    Of cause that cursed Thing-o-Matic failed during the print...twice. So 2x4 layers in the middle of the print are more or less missing.

    2012-07-31

    Joining 3d printed parts

    Nophead posted a link to a video about a simple connector to connect 3d printed parts via friction.
    I suggest a tried and true method that requires even less precision: a Tusk Tenon

    Why?
    Because with the proposed locking joint hole and pluig have to highly very similar dimensions and shape. If one is wider, longer or deeper, the other will either not fit at all, have too little friction to stay put even under stress and vibration or will fit but both parts will have a tiny gap between them.
    With a Tusk Tenon all 3 parts can have any tollerance in any direction. You just choose an allowance wide enough so they still fit into each other. No matter how large the gap created by the allowance is, they will always align and lock in the same position, orientation and strength.
    Why create something new if we already have a solution that has proven to work very well for 500 years?

    2012-07-27

    No 5DtoRGB anymore

    Looks like we have a fix for the AVCHD problems (incorrectly mapping 0-255 to 16-235 color space) on the Mac issue with footage from 5D Sony FS100 and GH1/GH2 that doesn't involve transcoding in 5DtoRGB .

    I linked to the comment with the numbers for . The posting itself has the numbers for .
     

    2012-07-26

    YN460II modification with 3d printed parts

    Brainstorming 

    1. Replace both front and back. 
    2. Make it slightly longer to have a hole for an umbrella mounting between battery compartment and electronics.
      Use the free space left of the umbrella for a 12V DC plug and on the right for a battery/mains power switch.
    3. That power level LED mod looks great. Better integrate that into the case right away.
      http://www.flickr.com/photos/malow/5948108074/in/photostream
      http://www.flickr.com/photos/malow/5948112440/in/photostream
    4. Integrate the PCB of a remote trigger. Later to be replaced by an Arduino Nano+RF (to not only trigger the flash but also remote control the power.)
      1. Looks like thee are 3.3V and 5V for the RF-trigger PCB already present:
        http://www.dslr-forum.de/showthread.php?t=819870
        http://www.dslr-forum.de/showthread.php?t=967445&page=2

    Design

    TODO

    Final object

    TODO

    Mapping again

       Due to the fact that I am a Mentor in Google Summer of Code for a student improving Vespucci (and doign a great job at it),
      I finally found my way back to doing some actual mapping.
      Should have done this much more often. There are so many small details not present in OpenStreetMap...

    2012-07-25

    3d printing again

     After a long time of having the printers sitting in the corner I'm  back to designing and printing again.
    Will do the upgrade to Alibre Design 2012 in the next days and am currently constructing some special purpose GoPro mounts.
    (Yes, there are thousands of them but all just uneditable STL files and none of them do what.)
    I'll of cause publish technical drawings too. So other then the many STL-only versions you can look up the dimensions comfortably to design your own without using a tool like Netfabb Studio to meassure inside an STL or get a GoPro first.

    7/16 inch imperial ********

    Needed a 7/16" pipe fitting for a vacuum pump yesterday.
    Nobody seems to have something like that.
    Certainly not one with a seal made to work fine with very low pressures.

    Luckily 7/16" seems to be a "standard" pipe fitting for beer kegs...

    The nice thing about standards is that there are so many of them.
    I want my SI back!

    2012-07-24

    Paid reviews

    I advise to ignore androidmag.de and other such publications of the cda-verlag like ANDROID MAGAZIN and ANDROID APPS.
    They just cold called me and offered to make Vespucci (the OpenStreetMap editor) an app of the week for  490,- euro plus taxes including a video review.
    I have to assume all their existing reviews and apps of the week are paid for as well.

    2012-07-18

    Rebuilding an existing camera

    I recently found an announcement and later a story about the final product on EOSHD.
    The product is a modification to the NEX 5N camera. Producing an entirely new case for this camera with active cooling (because the camera has overheating issues),  locking HDMI sockets, reinforced USB connector, huge monitor,...
    This fascinated me. Having taken apart one Panasonic GH2 already in the past, I though about what it takes to do such a thing for this camera too and what options this provides.
    In the end I settled to do an alternative case for something much simpler first. For the YN460 II flashes. The point being to integrate umbrella holder, external power socket, and my existing radio triggers into one flash body.
    Then I found a posting on DVXUsers.  It seems that back in april a user named "rigs" got the idea of a custom machined new body for the GH2 with an incredible array of planned features. So it seems like someone else not only though of this but actually started for the GH2. The discussion is still going on, so the project seems to have not died in the last few month.
    I'm not sure if I should do such a think. Printing objects of that size is ...difficult on the ThingOMatic lately. In a month the GH3 will be relased. I'm selling my two GH1 to replace one of them with a  GH3 and the other with a second GH2. Difficult to decide on a project.

    I guess I'll offer Rigs my help but all on my own I'll work on these modified flashes and cool mounting options for the GoPro.  ...and on actually editing the video clips I already made.

    Got a GoPro

    Having already 3 DSLR bodies and an expensive collection of lenses for them, I convinced myself to not get an action cam myself.
    ....until I just got the chance to help myself to a GoPro Hd Hero II outdoor edition for much less then the usual retail price.
    Having a huge number of cool mounting options on Thingiverse to 3d print for this helped a lot to justify the expense. After all, this caters to two of my hobbys. Filming and 3D printing/CAD.

    So here it is...my fourth and (as my wallet tells me) hopefully last simultanous camera angle.


    2012-07-08

    Panasonic GH2 powered via USB battery

    I'm already using a 3600mAh external cellphone battery that outputs 5V USB power to run my Zoom H4n audio recorder for extended recording times.
    Recently I found a 10'000mAh battery that not only has 2 USB outputs but also a third output that can be switched to 12V or....9V.
    Perfect to run the GH2 camera!
    It turns out that even the proper adapters are already included and have the polarity required.
    Here is what I used:
    The original batteries are 7.4V 1200mAh. The power bank is 5V 10000mAh.
    This is about 5.6x the capacity of a Panasonic battery for this camera.
    Of cause it will be significatly less of this device also powers the Zoom H4n and 1-2 phantom powered microphones through it.
    ...or multiple GH2 cameras from one power bank.
    ...or something else that runs on 5V USB power from the second USB port. (Arduino? Video light? ...) 

    2012-07-04

    Rode Stereo Video Mic Pro - evaluating the most ugly microphone ever

    When I started doing video with a DSLR (actually with EVIL cameras), I quickly found the in-camera sound to be unacceptable and got myself a Sennheiser MKE400. I wanted to have a tiny shotgun that would get me the sound of whatever was in front of the camera and ignore everything else. It seemed a reasonable choice at that time. However it turned out that very often I find myself in one of two situations:
    • Having the time to prepare the right kind of equipment to record one special kind of event using as much and as specialized gear as I find necessary and practical.
    • Recording ambiance and B-roll with whatever I have in my pocket at that time.
    For the first occation I have my trusted Zoom H4n and a small collection of micropones. A large diaphragm and a headset for voice overs and commentary, a pair of shotguns for stages and booming, dynamic handmics for interviews.
    It would seem natural to use the H4n with it's great internal microphones to collect B-roll. It it nearly perfectly suited for this job. Just place it in a corner or on a camera with a wide angle lens and keep rolling.
    Why would I choose not to?
    Because it is inpractical and with time you tend to avoid inpractical things.
    • It is large and heavy.
    • When used before, it's batterys are often quite down already.
    • You need to sync the sound to the camera later. (Syncing is trivial but identifying what sound belongs to what picture takes time and organisational effort.)
    So here I am, evaluating the Rode Stereo Video Mic Pro.
    The purpose being to have it on camera for wide shots to capture ambience right in the camera. This need not be B-Roll. It can very well be a sound performance or a groups of people standing close together. Anything that does not require a directional pattern.
    So what did I find?
    • It is lightweight and small enough to just keep it on the camera. It doesn't even affect the center of gravity even of a small mirrorless camera like the GH1 and GH2.
    • Contrary to the H4n it is practically unaffected by wind. The 2 microphones are mounted inside a round blimp below a foam cover. I did not even feel the need to unpack the deadcat I got for it.
    • It picks up lower frequencies much better then the H4n. I'm not sure yet that this is a good thing or if they are overrepresented.
    • The low-cut is useless. Even the lowest frequency rumbling of a bus you're sitting it are reduced at all.
    • I still have to test the +20dB gain on the GH2 and GH1 cameras.
    • The hotshoe has an incompatible threading. It's 1/2" microphone threading and not 1/4" as for camera equipment. This would be fine for booming except that an purely omnidirectional on-camera microphone with a 3.5mm stereo-jack is not reasonable for booming at all.

    2012-06-27

    Mounting a camera to a camera

    Why did I post about doing heavy multicam work in Final Cut last night?
    Because this is what I did:


    With the upper camera on full-auto with a 14mm (x1.86 crop at 16:9) I operated the lower camera on full manual to get some great closeups and medium shots.The upper camera gave me a wide shot of the same scene. The slight movement of the lower camera to frame the detail I want to show isn't noticable in the far wider shot of the upper camera.

    This way in editing the video I can now show the closeup of insecure, shaky feet on a tightrope. Then cut to the wide shot to show that this is happening at the equivalent of a third floor between 2 tall trees. Then cut to the concentrated and freightened face of the person because in between I turned the rig ever so slightly.

    2012-06-26

    Multicam in Final Cut Pro X - lessons learned

    Lessons learned regarding multicam editing in FCPX so far (regarding an efficient workflow):

    Preparation:
    • Sync your camera+sound recorder clocks to the second before shooting. FC will do the syncing for you but this helps to identify clips that belong together.
    • If possible, also record the same clock simultanously. e.g. have a clock visible on a slate.  This way you can adjust any remaining timecode differences later.
    • For short, overlaping clips having one continous master recording is not needed but could help. A long sound recording to get some ambience is helpful anyway.
    • Too many compound clips and multicam clips make FCPX crash. ...very often and repeatable
    • Do color correction after all the edits especially with multicam clips. It slows down FCPX a great deal.
    Importing SD cards:
    • Keep the SD cards in the cameras/sound recorders until that one card gets imported maintain the relationship between camera and clips on the card
    • Right after importing one card, tag all these clips with the name of the camera (and possibly also an "untagged" to find clips that need further tagging later)
    • Also set the camera-name (in the inspector) for these clips. These will become our track-names within the multicam clips.FCPX will use the volume name of the SD-card as default.
    • Tag clips that belong to multicam recordings as "multicam_input". This way you can find them between all the singlecam recordings
    Syncing:
    •  Start from the top of the "multicam_input" collection and mark the clips for the first multicam clip.
    • For "camera assignment" (DE: "Kamera zuweisen") select "camera name". "auto" doesn't work and  "clip" creates a mess of tracks if you have multiple clips from one of the cameras.
    • FCPX will jump to the new multicam-clip. You'll loose your position in the Event Browser and the new clip will have no tags. Click that clip to quickly check. Unmatched clips are put at the beginning of the multicam clip.
    • Go back to "multicam_input", mark the clips you used, tag them "multicam_done" and then remove "multicam_input" from these clips. You can still see the clip-names in the timeline.

    Final Cut Pro X "Camera Clips Selected" / "Kamera-Clips ausgewählt"


    Final Cut Pro X did crash a few times during importing a large number of SD cards and moving the event to an external drive.
    Now there are 8 clips in my Event Browser showing a little camera symbol.
    I can't analyse them because of a message:

    "Kamera-Clips ausgewählt" (I have the German version of FCPX.)
    "Kamera-Clips können nicht verarbeitet werden. Sie müssen zuerst diese Dateien importieren/erneut importieren, um sie zu verarbeiten."

    I found the proper original term by guessing:
    "Camera Clips Selected"
    "Camera clips cannot be processed. You must import/reimport these first in order to process."

    These clips are only shown if the SD-card with these clips is inserted while FCPX starts up and stays mounted.

    Problem is: FCPX doesn't do anything when I select these clips and import them because they are already imported.
    The help-system doesn't even know the term "Kamera-Clip", so it is either inconsistently translated or there simply is no documentation what this is and how to deal with it.

    2012-06-04

    LogicKeyboard LKB-FCPX-AM89-GR is NOT for FCPX

    I got myself the "LKB-FCPX-AM89-GR" model keyboard fron LogicKeyboard to make it easier to learn the keyboard-bindings of Final Cut Pro X (without having to put up with the rubbery feeling of a silicone keyboard cover).

    Just as a warning to everyone else out there.
    Do not be fooled by the "FCPX" in the name.
    The keyboard-bindings it contains are not for FCP X but for FCP 7.

    For example:
    • P is labeled as "pen tool". While it is "Position".
    • Z is not labeled at all while it is "Zoom". One of the 7 major tools in the timeline.
    • K is only labeled as pause for J,K,L while CMD+K is the all-important keyword-tool.
    • S is labeled "Slip/Slide" while it enables/disables "Skimming" instead.
    • F is labeled "MatchFrame" instead of "Favorites"
    • ...


    I'm currently working through a tutorial that finaly explains the intended workflow instead of just hyping about how great some new features are. What I'm still looking for is
    1. a way to read the help-file while offline in a train to lean and understand this tool and
    2. some documentation or tutorial explaining the UI- and workflow- concepts. (Why some things apply to a whole clip and others only to segments of a clip. When clip A is selected, where in the UI to look for what kind of operation or information. What the concept of multicam vs. synchronised clips vs. compound clips are. ...)

    2012-06-01

    Modding my shoulder rig

    I just modded my foldable shoulder rig some more.
    I already rebuild it to fold asymatrically like the original dv_tec MultiRigPro it tries to immitate.
    (It sits on one shoulder. It has no right to be symmetrical and is much more comfortable this way.)
    This allowed me to add a front support in the past.
    Another thing I already did was to add a holder for the remote control to the Zoom H4n audio recorder to my left and buttons for start/stop recording and to force autofocus to the right handle.

    What I did now was to add a monitor with peaking and 1:1 crop and to add holes for mounting a 15mm rod system and thus a follow focus in a very, very compact way.